

Quick Start: Your First Day in Chatterfy
By the end, you’ll have a bot connected in CRM, basic settings (time zone, status, description), and one simple flow with a greeting. After that, you can move on to AI, Tracker, and more complex scena
By the end, you’ll have a bot connected in CRM, basic settings (time zone, status, description), and one simple flow with a greeting. After that, you can move on to AI, Tracker, and more complex scenarios in the builder.
What to prepare
- A Chatterfy account with a registered company. If you don’t have one yet, sign up
- At least $100 in USDT in the company balance. Required to activate the company. Learn more — How to top up a company.
- A Telegram account for working with @BotFather. A second Telegram account will also be useful — for testing the bot as a client (you can also test from the same account).
- An understanding of the bot’s task — accepting requests into a channel, communicating with leads, supporting buyers, or selling a course. You can keep it in mind; no formal document is required.
Steps
1. Create a Telegram bot via BotFather
In Telegram, open @BotFather and send the /newbot command. BotFather will ask for:
- Bot name — displayed in the chat and in the client’s dialog list.
- Username — Latin letters, numbers, and underscores only; it must end with bot. Example: mycoolbot, my_test_bot.
After creation, BotFather will issue a token — a long string like 123456:AAH... Copy it and save it in a secure place.
Токен даёт полный доступ к управлению ботом. Не передавайте его третьим лицам и не публикуйте в открытых чатах.

Важно: при подключении бота через Chatterfy он должен быть интегрирован только в Chatterfy. Подключение к любым другим сервисам может вызвать сбои и проблемы в работе.
Detailed guide — Creating and Connecting a Bot — Overview. If you need another connection type (Personal via a personal account, Business via Telegram Premium, Invite for accepting requests into a channel) — Types of Bots in Chatterfy.
2. Connect the bot in Chatterfy
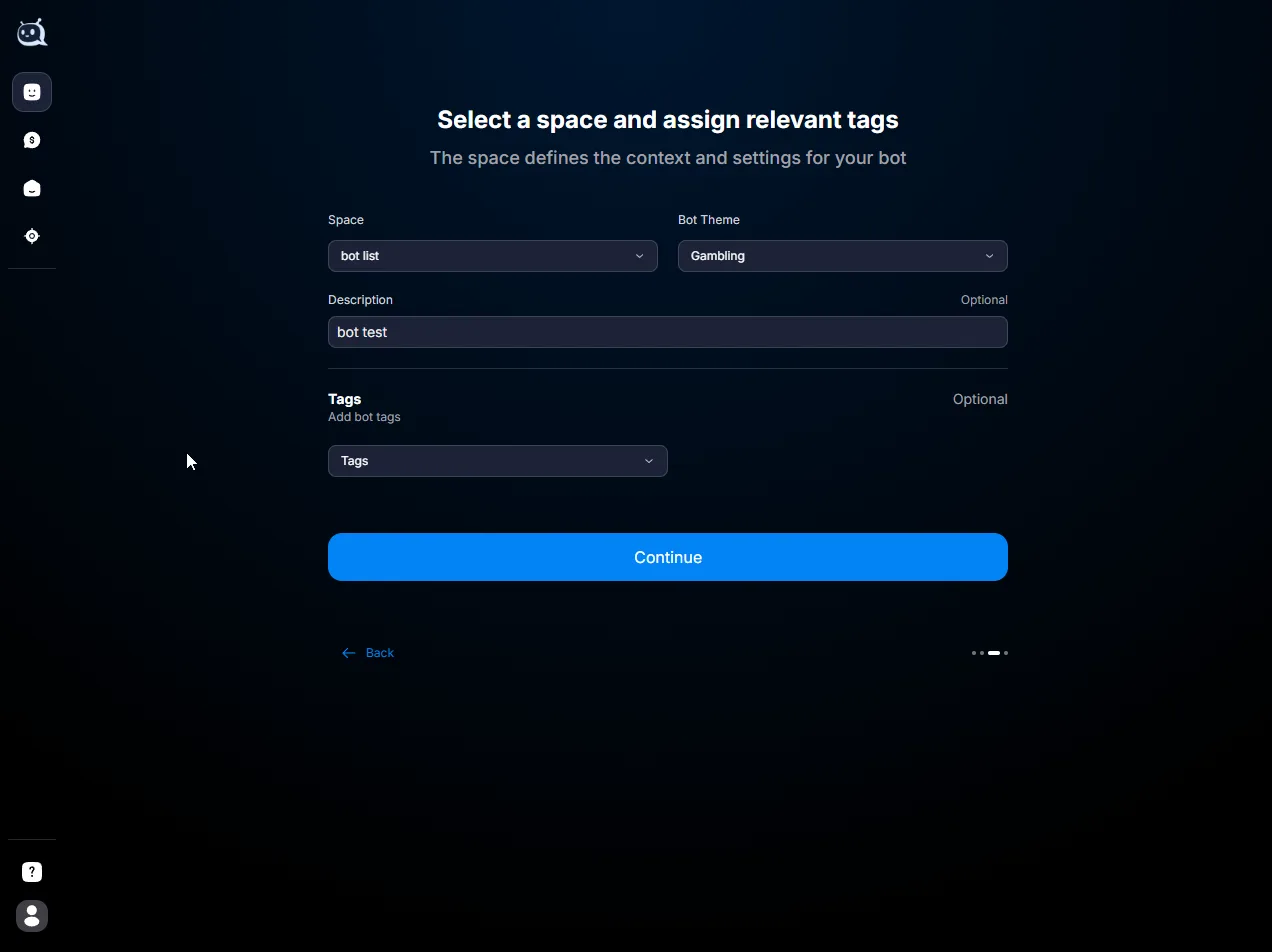
Open the CRM section and click Create New Bot. Fill in the fields:
- Platform — Telegram
- Connection type — Standard (universal, suitable for most scenarios)
- Space — the workspace where the bot will be located
- You can specify a description, topics, and tags for the bot if needed
- Token — paste the value from @BotFather
- Click Create Manually for a quick start
Тип подключения выбирается на этапе создания бота. Поменять его потом без пересоздания нельзя.
3. Check the basic settings
Open Bot Settings → General and check four parameters:
- Status — Active. If the bot is turned off, switch the toggle on.
- Time zone. Select the zone where the team or target audience operates. Delays and time-based conditions in the funnel, as well as analytics data, depend on it.
- Space. Make sure the bot is in the correct Space. Moving it to another Space later is possible, but requires a separate action.
- Internal description. A short note visible only to the team. Helps avoid mixing up bots between projects. Example: “Telegram bot for arbitrage traffic, Tier-3 GEO, Spring 2026 campaign”.
Таймзона влияет на всю аналитику бота. Если поменять её после запуска трафика, время в старых отчётах останется в прежнем поясе. Задавайте таймзону до первого включения.
Full overview — General — basic bot settings. A little later, you will need to configure: Delays — bot delays, Notifications — Telegram Notifications for the Team, Sale Status — sales funnel stages, Tags — tags for segmentation.
4. Build your first flow
Open Flow Settings. One empty flow has already been created in an empty bot — build a minimal scenario with two steps:
- Send message — a greeting for the customer. For example: “Hi! I’m the bot for company X. How can I help?”
- Send message — a short instruction or link. For example: “To get started, select an option below”.

В Быстром старте намеренно не используется AI Reply — для него требуется отдельная настройка (личность бота, модель). Когда дойдёте до AI, начните с How to connect AI to a bot.
Full description of the builder — Create New Flow — creating a flow, Flow step types, Send message — sending a prepared message.
How to check that everything works
Open the bot from your Telegram account. Send /start — the first message from the flow should arrive. Open Messenger в Chatterfy — диалог появится в списке чатов с историей сообщений. in Chatterfy — the conversation will appear in the chat list with the message history.
If the greeting arrived and the conversation is visible in Messenger, the basic setup is complete.
If it doesn’t work
The bot doesn’t respond to /start
- Check the bot status in Bot Settings → General — it should be Active.
- Check the token. If it was accidentally regenerated in @BotFather, the old token stops working.
- Make sure this bot’s token is not being used in another system at the same time. Telegram delivers updates to only one recipient — a parallel connection breaks message delivery [NEEDS CONFIRMATION: exact wording for troubleshooting in Chatterfy].
Not sure what to choose — Standard, Personal, Business, or Invite
- Standard — the main type; the bot communicates with customers in chats. Suitable for most scenarios.
- Personal — communication through a personal Telegram account; sign in by phone number or QR code.
- Business — a personal account with Telegram Premium and higher limits. The 24-hour response window restriction applies.
- Invite — a narrow role: accepting channel join requests and sending a welcome message. No CRM or AI processing.
Where do I get the balance details — where should I transfer funds?
Top-ups are made in USDT. The minimum is $100 to activate a company. Payment details and steps — How to top up a company.
Connected it, but there are no conversations in CRM
- Make sure you opened the same Space where the bot is located.
- Check that the test message is going to the exact bot (by username) that you connected.
- Check the time zone and status — if the bot is turned off, conversations are not recorded.
What’s next


Was this article helpful?