

Facebook — Source with Meta Pixel
A Source with Provider = Facebook is needed when you drive traffic from Meta Ads (Facebook, Instagram). Tracker links your campaign events to the Facebook pixel and sends conversions back through the
A Source with Provider = Facebook is needed when you drive traffic from Meta Ads (Facebook, Instagram). Tracker links your campaign events to the Facebook pixel and sends conversions back through the Conversions API. This is critical for ad optimization: without sending events back, Facebook does not “understand” which leads convert, and the algorithm works blindly.
When you need a Facebook Source
You run traffic through Facebook Ads Manager and want the ad algorithm to optimize for target events (FDs, registrations, any conversions). You want to see conversions in the Facebook account itself in the Custom Conversions columns. You use Lookalike audiences based on paying users — Facebook needs the signal that “this user made a deposit.” You run A/B tests of different creatives and want to see each one’s conversion rate in Facebook (not only in Tracker).
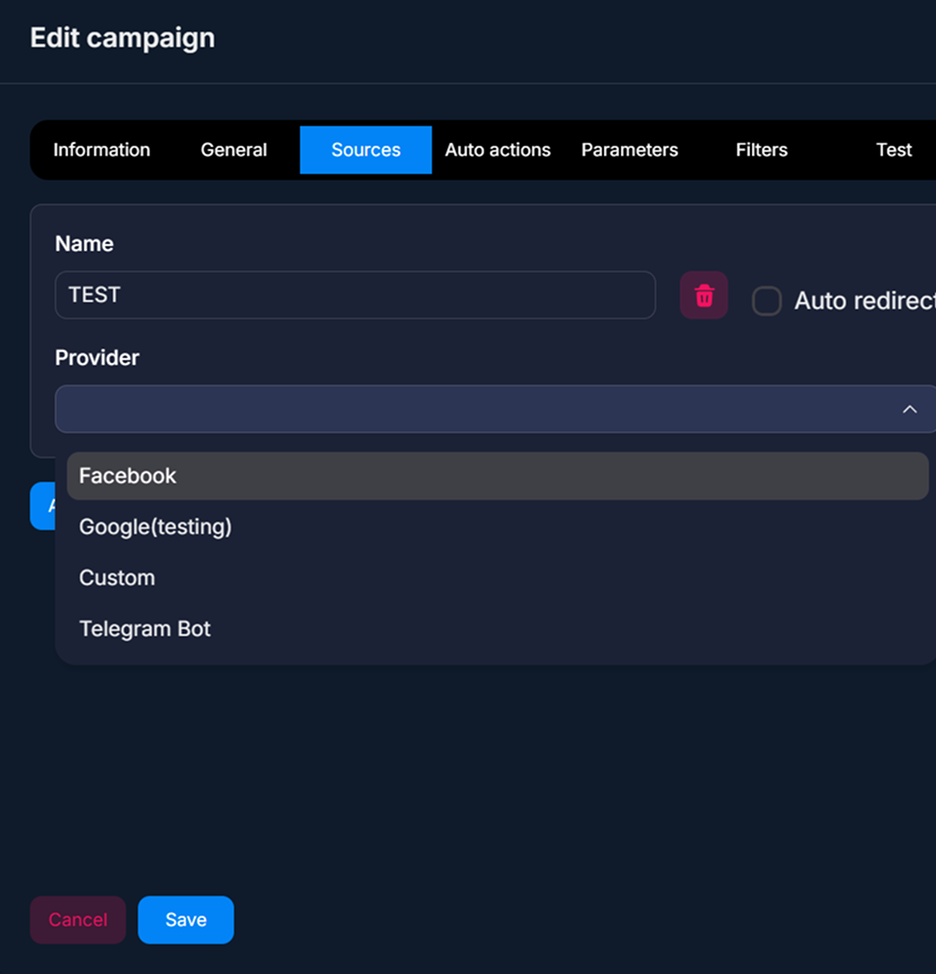
How it works
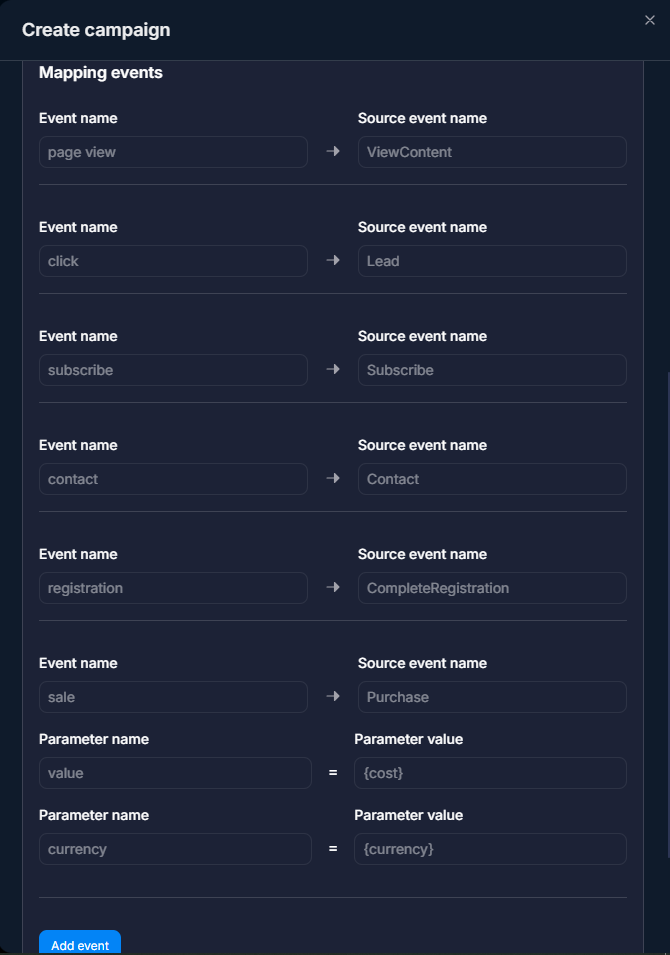
Tracker is the server-side part of this flow. It creates and sends events to the Conversions API: ViewContent on Page View, Lead on Click, Subscribe on subscription, Contact on the first message in the bot, CompleteRegistration on registration in the affiliate program (if a postback is received), and Purchase on the first deposit. The mapping is configured in Mapping events — you can adapt it to the structure of your Custom Conversions in Facebook.
Setup steps
Create a new Source
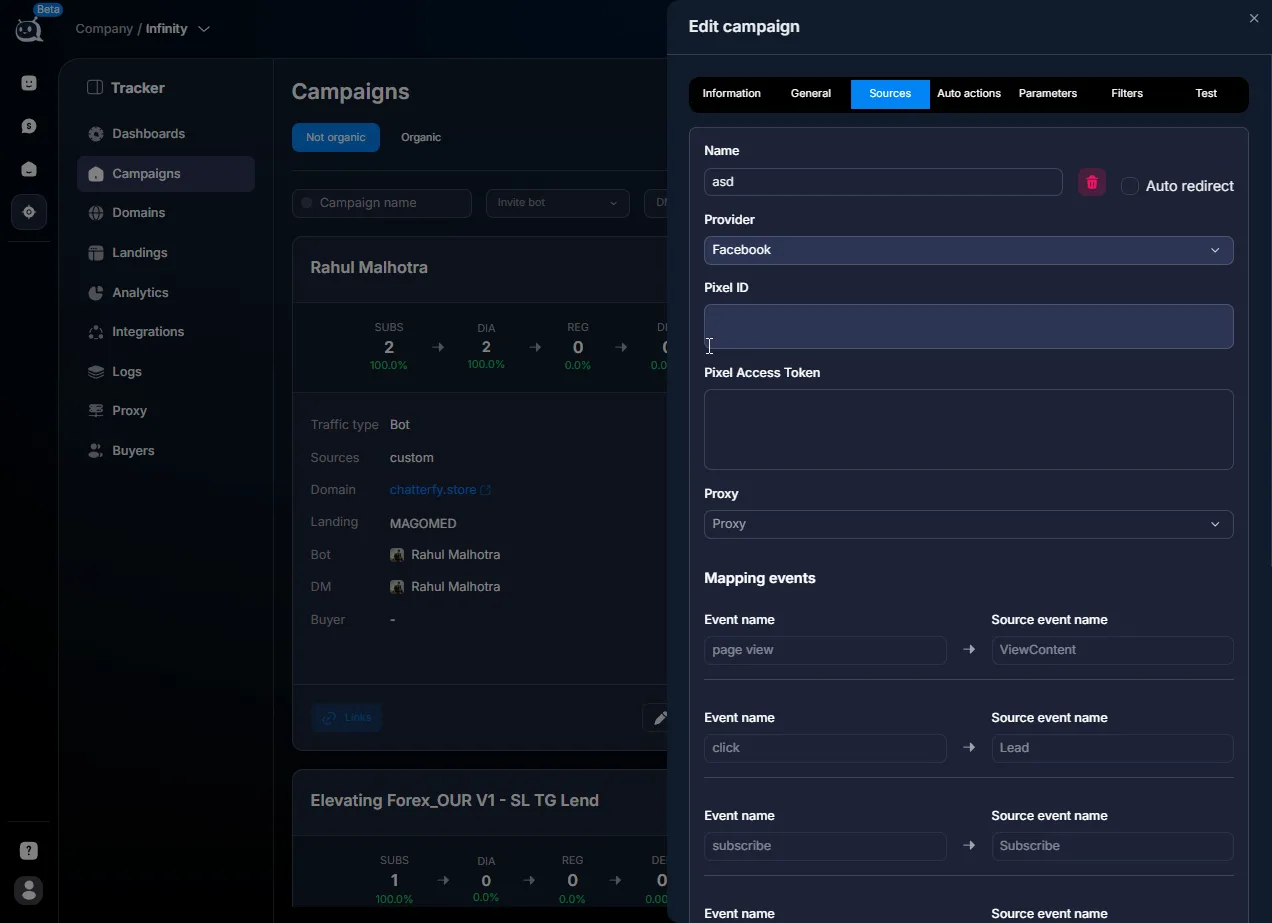
Fill in the Pixel ID
Take the Pixel ID fromFacebook Events Manager→ Data Sources → your pixel. It is a 15–16-digit number.Fill in the Access Token
Generate it in Events Manager → Settings → Set up → Conversions API → Generate Access Token. It is valid for 2 months — after that you need to issue it again.Connect a Proxy (optional)
If you want to send events through a proxy, select a connected Proxy — proxy for S2S. This reduces the risk of blocks and lets you “bind” outgoing traffic to the required geography.Configure Mapping events
By default, the mapping is standard (see the table below). If your Custom Conversions in Facebook are named differently, adjust them here.Save and check
After Save, Tracker will generate a Tracking link — copy it into Facebook Ads. Make a test click and check the sending in “Logs — event log” Logs — журналы событий — Sources logs.
Mapping events — standard correspondence
Tracker event | Facebook event | When it triggers |
|---|---|---|
page view | ViewContent | Landing page opened. |
click | Lead | Click on the button to go to Telegram. |
subscribe | Subscribe | Joining a channel or opening a bot. |
contact | Contact | First message from the lead in the bot / DMs. |
registration | CompleteRegistration | Registration in the affiliate program (received via postback). |
sale | Purchase | First deposit (received via postback). |
Additionally, Tracker sends the following parameters to Facebook:
- value = {cost} (deposit amount from the postback).
- currency = {currency} (currency).
This allows Facebook to see the value of each conversion — for optimization by ROAS / value-based bidding.
Source fields
Field | What it defines | Where to get it |
|---|---|---|
Name | Internal source name. Visible in Tracker filters. | FB-US-Forex |
Provider | Source type. Select Facebook. | — |
Pixel ID | Pixel identifier in Facebook. | Events Manager → Data Sources → your pixel |
Pixel Access Token | Server token for Conversions API. Valid for 2 months. | Events Manager → Settings → Conversions API → Generate Access Token |
Proxy | Optional. Proxy for outbound requests. | |
Mapping events | Mapping of Tracker → Facebook events. Standard by default. | — |
Usage examples
Standard Forex offer setup — arbitrage
A buyer sends a Forex offer from Facebook to the US. Creates a Source with Pixel ID =
123456789012345, an Access Token from Facebook, and the default Mapping (Subscribe → Subscribe, Contact → Contact, Purchase → Purchase). After a day, the Custom Conversions column appears in Facebook Ads Manager, showing Subscribes and Purchases — the ad algorithm starts optimizing for them.Custom Mapping for specific Custom Conversions
The client has Custom Conversions configured in Facebook with the names
TgChannel_Sub, TgChannel_Lead (from an old solution; changing the names would take a long time). The buyer overrides the Mapping: subscribe → TgChannel_Sub, click → TgChannel_Lead. Tracker sends events under these names, and Facebook picks them up.With Proxy — bypassing blocks
The buyer noticed that Facebook rejects 30% of events (visible in “Logs — event log” Logs — журналы событий — Sources logs with the Error status “Invalid token” or “User-data missing”). Enables Proxy — proxy for S2S with a US IP (where the traffic is concentrated). After 2 days, the rejection rate drops to 5%, and optimization in Facebook stabilizes.
Important things to consider
The Pixel Access Token is valid for 2 months — after it expires, you need to regenerate it. Set a calendar reminder for this, or monitor Sources logs (a sudden spike in Error means the token has died). Pixel ID is required — without it, the event simply will not be sent. Mapping events can be changed “on the fly” — changes are applied instantly to new events. With Proxy, events are sent to Facebook faster and more reliably, especially at high volume. Test sending in Logs — журналы событий after every settings change — it shows the actual status of each event.
FAQ
Related


Was this article helpful?