

S2S Postbacks — Sending Events from a Campaign
S2S postback sends a request to an external system when a selected event occurs in a campaign. This is a convenient alternative to webhooks if you need to link an action to a campaign event rather tha
S2S postback sends a request to an external system when a selected event occurs in a campaign. This is a convenient alternative to webhooks if you need to link an action to a campaign event rather than a specific step or stage of a funnel.
Main difference. S2S is configured once per event and triggers regardless of which step of the scenario that event was created in.
Where to set up S2S postback
1. Open Campaigns
Go to
Tracker → Campaigns.2. Select a campaign
Find the required campaign and click
Edit.3. Go to S2S
In the edit window, open the
S2S tab.4. Add a postback
Click
Add S2S postback, fill in the parameters, and save the campaign.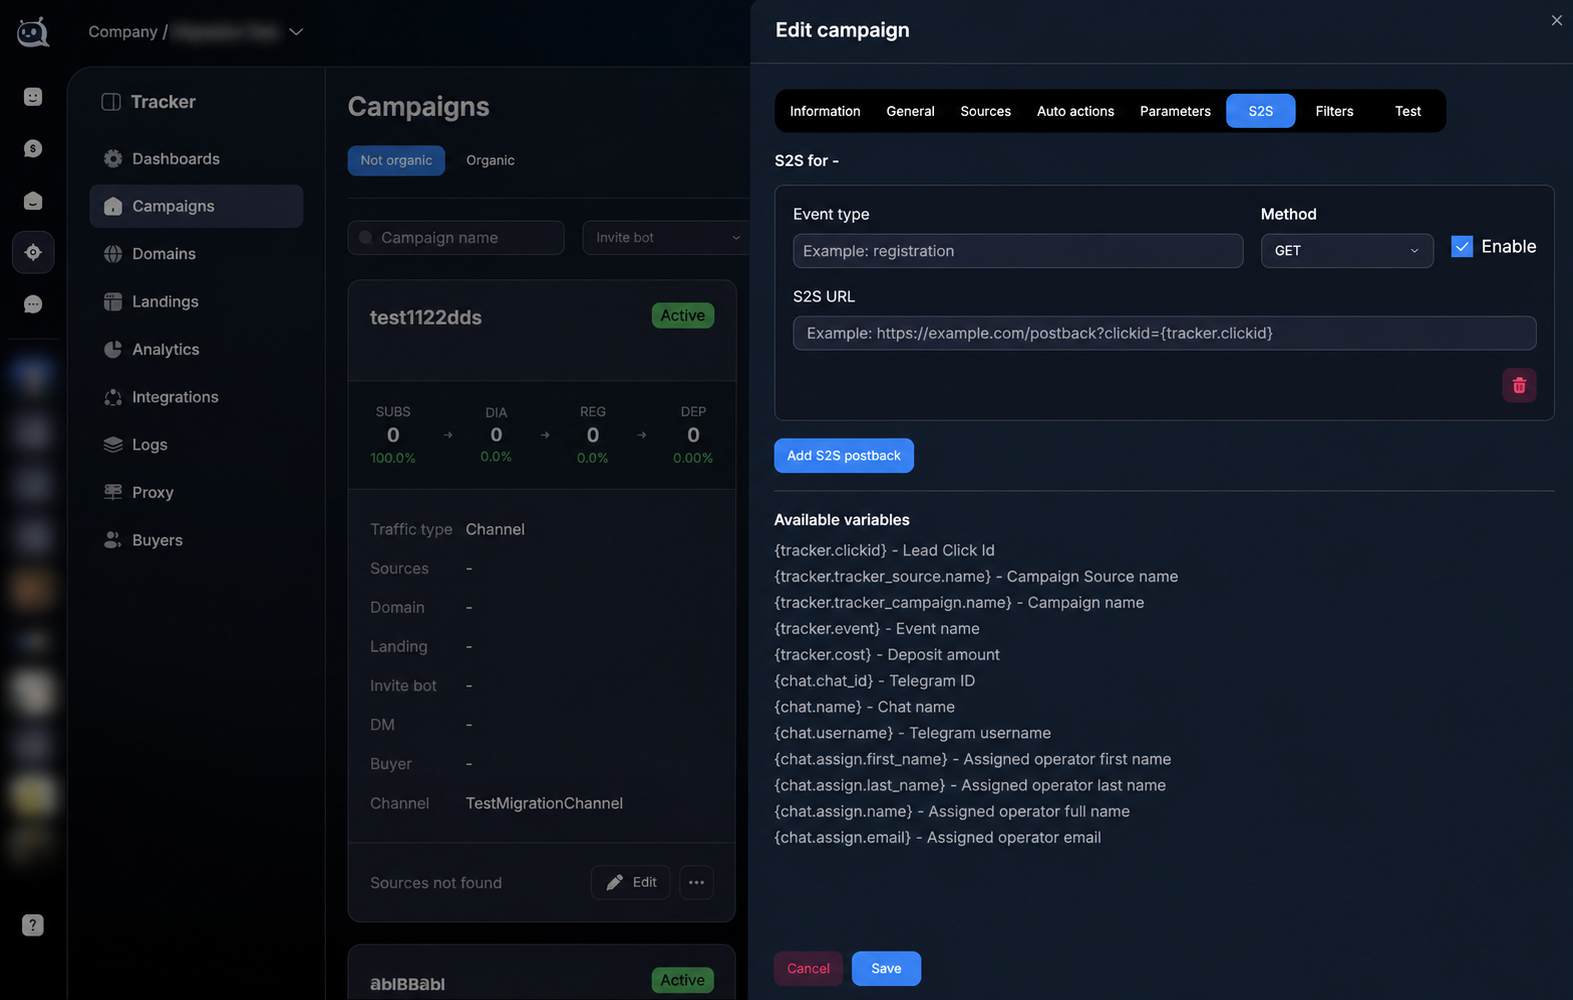
Postback configuration
•
Event type — the event upon which the request is sent.•
Method — the HTTP method that your system accepts.•
S2S URL — the recipient's address along with the necessary parameters and variables.•
Enable — enables or temporarily disables a specific postback.You can add multiple S2S postbacks to a single campaign and assign a unique event, URL, and method to each one.
Events
In the Event type field, specify a system or custom event. Commonly used ones:
•
registration — user registration.•
sale — first deposit.•
resale — repeat deposit.• Custom event — any other event used in your funnel.
The event name must match the actual value sent by the scenario, including case and spelling.
System variables
Available variables are shown directly on the S2S tab. During transmission, Chatterfy will replace the variable with the actual value from the event, campaign, or chat.
•
{tracker.clickid} — lead Click ID.•
{tracker.tracker_source.name} — campaign source name.•
{tracker.tracker_campaign.name} — campaign name.•
{tracker.event} — event name.•
{tracker.cost} — deposit amount.•
{chat.chat_id} — Telegram ID.•
{chat.name} — chat name.•
{chat.username} — Telegram username.•
{chat.assign.first_name} — first name of the assigned agent.•
{chat.assign.last_name} — last name of the assigned agent.•
{chat.assign.name} — full name of the assigned agent.•
{chat.assign.email} — email of the assigned agent.text
https://example.com/postback?clickid={tracker.clickid}&event={tracker.event}&amount={tracker.cost}How to pass data from Custom Fields
In addition to the list of built-in variables, you can pass the value of any custom chat field in the S2S URL. Use the format:
text
{chat.fields.custom_field_key}For example, for a field with the key
age, the variable will look like this:text
{chat.fields.age}To find the field key, open the required bot and go to
Bot Settings → Custom Fields. Use the value from the Key column, not the display name from the Name column.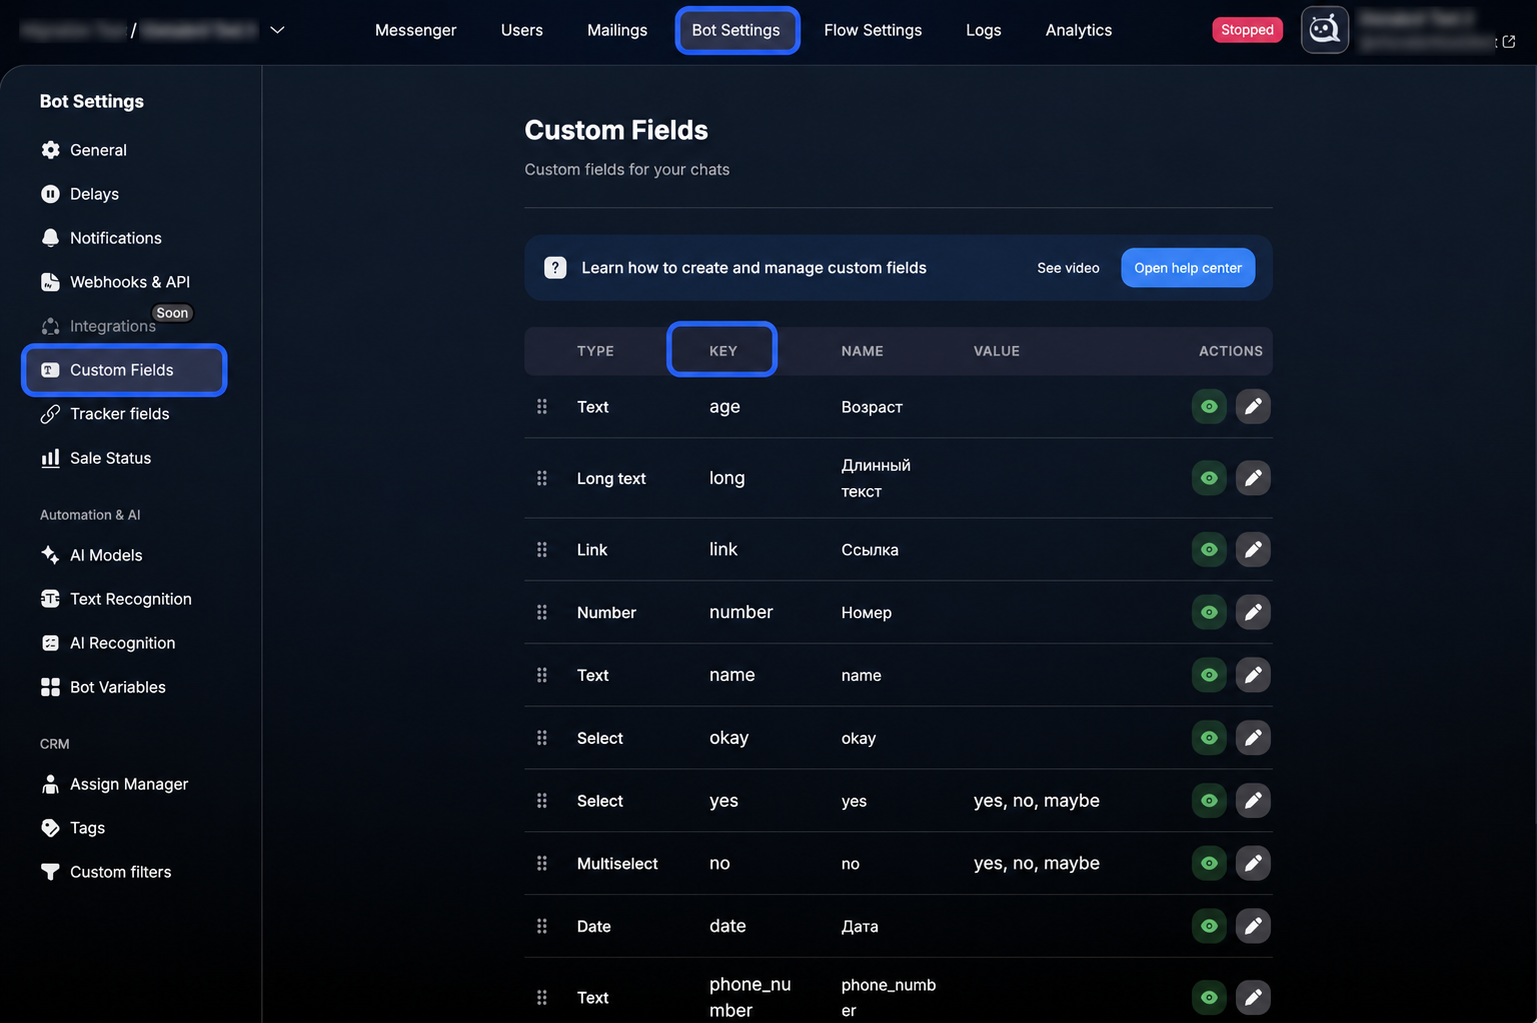
text
https://example.com/postback?clickid={tracker.clickid}&age={chat.fields.age}Before testing, ensure that the required custom field is filled in for the test chat before the event is triggered.
How to check the transmission
1. Save the campaign
Check that the
Enable parameter is turned on for the postback, then click Save.2. Create a test event
Guide a test user through the required event, for example, registration, sale, or a custom event.
3. Open S2S logs
Go to
Tracker → Logs → S2S logs.4. Check the request
Compare Status, Campaign, Event, Click ID, Method, URL, and Body. In case of an error, first check the event, address, and whether the required data is provided.
Common errors
• Event type does not match the actual event name.
• The Enable parameter is disabled for the postback.
• The URL contains the custom field Name instead of the Key.
• The custom field has not been populated yet at the time the event is triggered.
• The receiver expects a different HTTP method or a different parameter format.
• Special characters in the transmitted values are not supported by the receiving system without URL encoding.
Was this article helpful?