

Custom Events
A custom event is an event with its own name that reflects an important lead action in your funnel. It complements the system events registration , sale , and resale . Use custom events when standard
A custom event is an event with its own name that reflects an important lead action in your funnel. It complements the system events
registration, sale, and resale.Use custom events when standard statuses are insufficient: for example, if a lead has passed KYC, confirmed an application, or completed an internal sales stage.
When to use
You need to record an action that does not relate to registration or deposits.
The scenario in Flow Settings must continue after a custom funnel stage.
You need to send an S2S postback to an external system for a specific lead action.
An operator has received confirmation of an action outside the platform and needs to record it in the chat card.
How to name an event
Choose a short, clear, and permanent name. For technical integrations, it is convenient to use Latin characters and underscores:
kyc_completed, application_approved, payment_confirmed.The name acts as an identifier. If it is used in Flow Settings or an S2S postback, the spelling must match exactly, including case and symbols.
Sending an event manually
- Go to Messenger, select the required dialog, and open the Events tab in the lead card.
- In the submission form, select the custom event option.
- Enter the chosen event identifier and check the spelling.
- Click Save. The event will appear in the lead's history and will be available for related logic.
Sending an event in Flow Settings
- Go to Bot Settings → Flow Settings and open the scenario where the event should be sent.
- Place the step at the required point in the scenario — after the action that should serve as a trigger.
- Specify the same name used in analytics, S2S, or other scenarios.
- Publish the changes and lead a test user to this step.
S2S integration and analytics
The custom event can be selected as the
Event type in the S2S postback settings. The request will then be sent every time a lead receives an event with this name — either manually or via Flow Settings.To verify, use the Events history in the lead card and the corresponding Tracker logs. Before launching on live traffic, ensure that the event name matches in all settings.
Important considerations
Do not use the same name for different actions: reports and integrations will become ambiguous.
Test the scenario on a test lead before enabling the S2S postback on a live campaign.
Manual sending logs the event immediately. Before saving, ensure that the correct lead and identifier are selected.
If an event is already in use via S2S, do not change its name retroactively — create a new one and update the associated settings.
Manual sending form
In the
Send event window, select the Custom type and enter the name in the Event field. If the event is related to a financial transaction, additionally fill in Cost and Currency in ISO format, for example usd.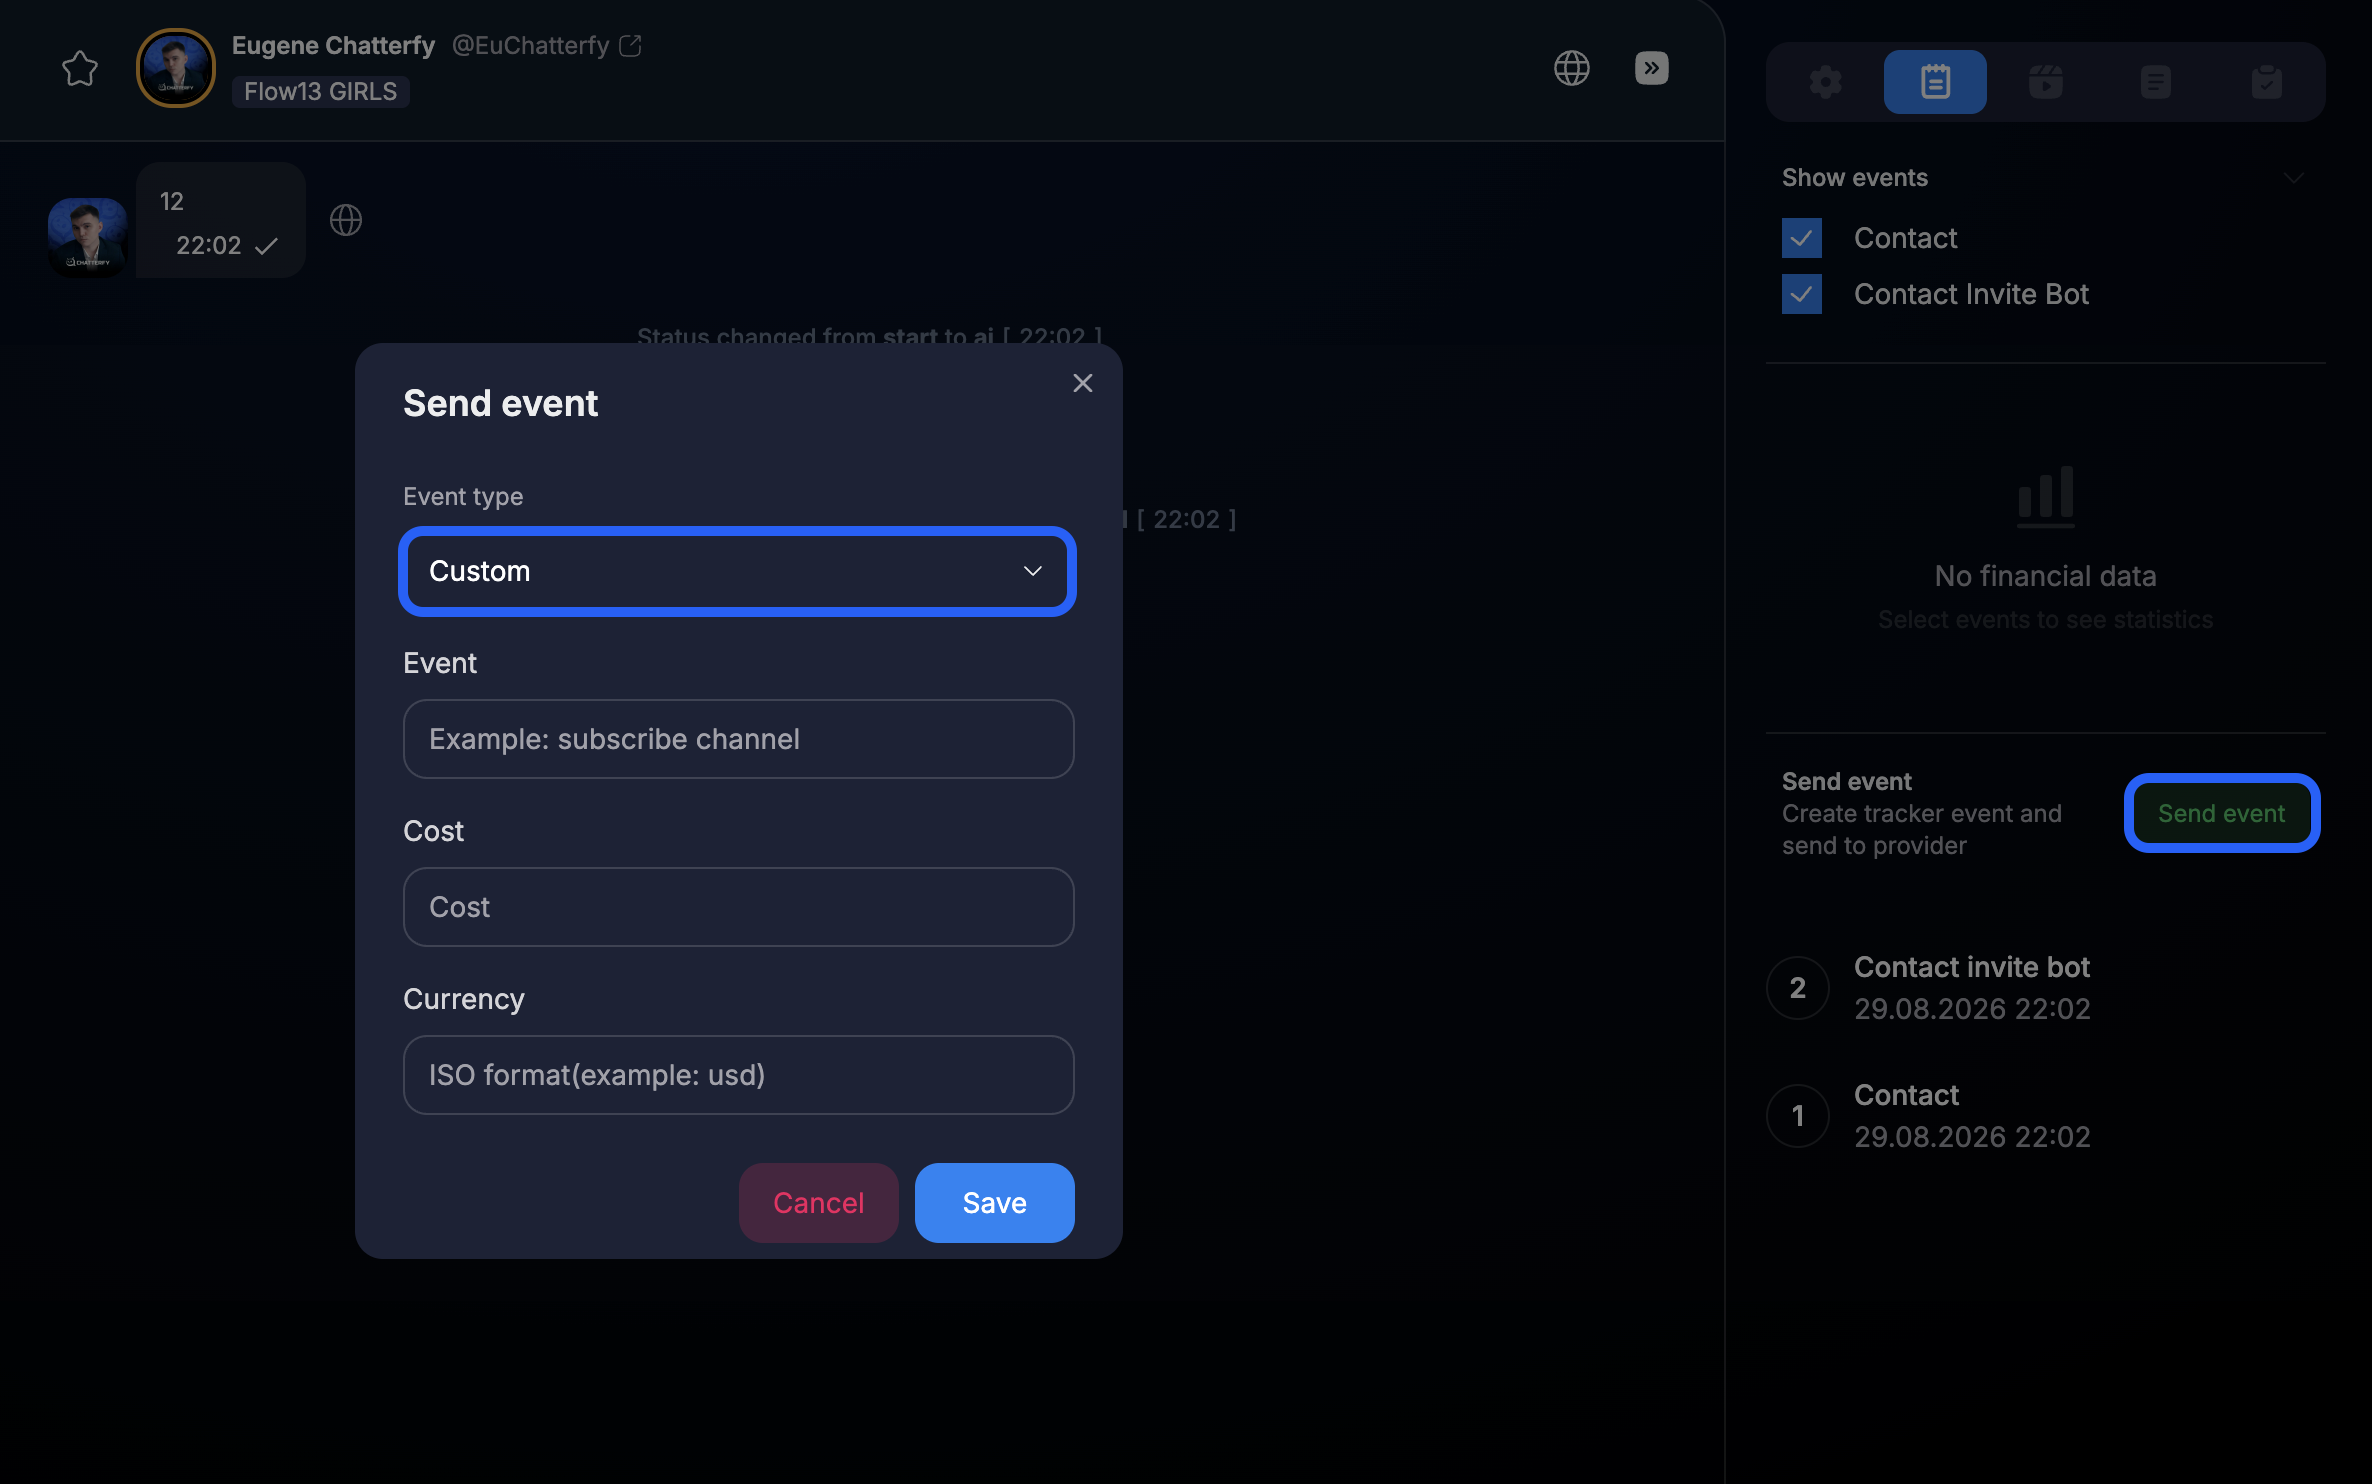
Was this article helpful?